
Best Ways to Personalize Daily Planners
Mitchell AdelmanTable of Contents
- Why Personalizing Your Daily Planner Matters
- Choosing the Right Planner Layout for Your Style
- Color Coding and Visual Organization Systems
- Best Handmade Stickers for Water Bottles and Planners
- Aesthetic Planner Decoration Ideas That Boost Creativity
- How to Organize a Planner for Productivity
- DIY Binding and Assembly for Custom Planners
- Making Your Planner Neurodivergent-Friendly
- Frequently Asked Questions
Last Updated: September 24, 2026
Why Personalizing Your Daily Planner Matters
A daily planner is only as useful as the system you build around it. When you personalize daily planners, you transform a blank template into something that actually reflects how your brain works. That's the difference between a tool you use and one that sits on your shelf.
At Cerulean Rooster, we believe that the most powerful planning happens when your system matches your personality. Whether you're neurodivergent, a visual thinker, or someone who thrives on color and creativity, your planner should work WITH you, not against you.

The real magic isn't in buying the "perfect" planner. It's in making it yours. When you invest time in customization, you create accountability. You build habits. You actually open the thing and use it.
Choosing the Right Planner Layout for Your Style
Before you start decorating, you need a foundation that fits your life. The layout of your planner shapes everything else.
Some people need hourly time blocking. Others work better with a simple weekly overview. Neurodivergent planners often benefit from more white space and fewer visual distractions. Maximalists want every inch of the page filled with possibility.
Here's what to consider when choosing a layout:
- Hourly layouts work best for structured schedules with back-to-back commitments
- Weekly spreads give you flexibility without overwhelming detail
- Monthly overviews help you see the big picture and plan ahead
- Blank pages let you create custom sections tailored to your needs
- Dotted grids work for both structured planning and creative freedom
The layout you choose becomes your canvas. If you hate the format, no amount of stickers will make you use it.
Color Coding and Visual Organization Systems
Color is the fastest way your brain processes information. A good color system makes your planner scannable at a glance.
The key is consistency. Pick 4-6 colors and assign each one a meaning. Stick with it.
Here's a framework that works for most people:
| Color | Purpose | Example |
|---|---|---|
| Red | Urgent or deadline-based | Project deadlines, hard stops |
| Blue | Work or professional | Meetings, client calls |
| Green | Personal goals or health | Exercise, wellness tasks |
| Yellow | Creative or flexible | Ideas, brainstorms, learning |
| Purple | Social or relationship | Dates, calls with friends |
| Orange | Financial or administrative | Bills, errands, paperwork |
Don't overcomplicate it. More than six colors becomes visual noise instead of clarity.
The best color systems are simple enough that you remember them without thinking. Your brain should automatically know what blue means the moment you see it on the page.
Best Handmade Stickers for Water Bottles and Planners
Handmade stickers transform a planner from functional to expressive. They're where personality happens.
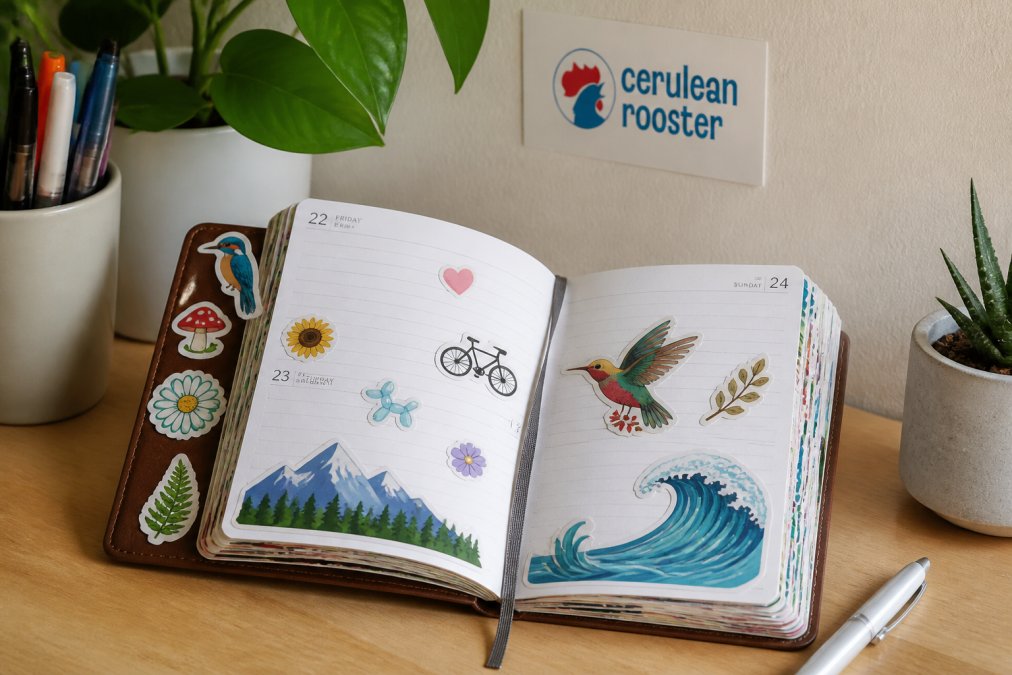
The difference between mass-produced stickers and handmade ones is immediate.
Why Handmade Stickers Stand Out
Handmade stickers aren't just prettier. They're made by real people who care about the work. Every line is intentional. Every color choice matters.
Sticker Placement Strategies
Where you put stickers matters as much as which stickers you choose. Strategic placement keeps your planner functional while making it beautiful.
Here's how to place stickers without covering important information:
- Corners and margins, Use stickers to frame your content, not cover it
- Section dividers, Place a sticker at the top of each new category to signal a shift
- Habit trackers, Add stickers to celebrate completed habits (visual rewards work)
- Page borders, Create a frame around the edge of your page to define the space
- Empty grid squares, If you use dot grids, fill unused squares with small stickers
- Tab markers, Stick stickers on the edges of pages to mark important sections
Aesthetic Planner Decoration Ideas That Boost Creativity
Decoration is where your planner becomes a reflection of who you are. It's not just about making it look good. Aesthetic choices actually change how you think about planning.
Pick Any 4 Stickers of Your Choice →
Minimalist vs. Maximalist Approaches
There's no single "right" way to decorate a planner. Your approach depends on how your brain works.
Minimalist planners work best for people who:
- Get overwhelmed by visual clutter
- Have ADHD or sensory sensitivities
- Prefer simplicity and function over decoration
- Need clear, uncluttered space to think
A minimalist approach uses:
- Lots of white space
- One or two accent colors
- Simple fonts and clean lines
- Minimal stickers or decoration
- Negative space as a design element
Maximalist planners work best for people who:
- Think visually and need color to stay engaged
- Love artistic expression and creativity
- Enjoy the process of decorating as much as planning
- Use visual density to stay motivated
A maximalist approach uses:
- Layered stickers and decorative elements
- Multiple colors and patterns
- Hand-lettering and varied fonts
- Illustration and mixed media
- Every available space as an opportunity for design
How to Organize a Planner for Productivity
Organization is the skeleton that holds your planner together. Without it, even the prettiest planner becomes chaos.
Start by asking what you actually need to track. Most people overestimate this. You probably need:
- Daily tasks and to-do lists
- Weekly goals or priorities
- Monthly overview
- One or two habit trackers
- A notes or brainstorm section
Adding Custom Sections and Tabs
Custom sections turn a generic planner into a system built for your life. Tabs make those sections actually accessible.
Here's how to add custom sections:
- Identify what you track, Write down everything you currently manage (finances, health, projects, relationships, creative work)
- Group related items, Combine similar tracking into one section
- Create a tab for each section, Use sticky tabs, washi tape, or die-cut markers to label sections
- Place tabs on the edge, Position them so you can flip directly to that section without hunting
- Keep sections consistent, Use the same layout for each section so it feels cohesive
Common custom sections include:
- Financial tracking and budgeting
- Health and wellness logs
- Project management pages
- Creative brainstorms
- Reading lists or learning goals
- Relationship or social tracking
- Gratitude or reflection pages
Goal Setting and Habit Tracking Integration
Your planner should connect daily actions to bigger goals. That's where real change happens.
Effective habit trackers:
- List 3-5 habits you want to build
- Use a checkbox or color-in system for daily completion
- Place them where you see them daily
- Review weekly to spot patterns
- Celebrate streaks (visual rewards matter)
DIY Binding and Assembly for Custom Planners
If you want complete control, you can assemble your own planner from scratch. It's easier than you think.
Here's the basic assembly process:
- Print all pages, Print front and back to save paper
- Cut pages to size, Use a guillotine cutter or craft knife for clean edges
- Organize pages in order, Stack them in sequence before binding
- Choose a binding method, Spiral binding, comb binding, or simple stapling all work
- Add a cover, Use cardstock or decorative paper to frame your planner
- Decorate the exterior, Add stickers, washi tape, or hand lettering to the cover
- Add tabs and markers, Use sticky tabs or ribbon to mark important sections
Making Your Planner Neurodivergent-Friendly
Neurodivergent brains often need different planning systems than neurotypical ones. The standard planner layout doesn't work for everyone.
- Increase white space, Cramped pages create anxiety and reduce focus
- Use visual timers, Add time-block visuals so you can see how long tasks take
- Color-code by priority and urgency, Not just by category
- Add reward checkboxes, Celebrate completion with visual markers
- Break tasks into smaller steps, Write the micro-step, not the big goal
- Use symbols instead of words, Icons process faster than text for many brains
- Create a "brain dump" section, Somewhere to capture thoughts without organizing them
- Add sensory elements, Textured stickers, satisfying pens, or tactile tabs
- Build in flexibility, Leave space for plans to change (because they will)
- Include a "chaos management" page, For days when nothing goes according to plan
Frequently Asked Questions
What are some creative ways to customize a daily planner?
The best ways to personalize daily planners include combining color coding systems with handmade stickers, adding custom tabs for different life areas, and incorporating habit-tracking spreads. You can layer visual elements, think washi tape borders, hand-lettered headers, and expressive vinyl stickers, to create sections that feel authentically yours. Handmade stickers, in particular, add genuine character because they're designed with intention rather than mass-produced. Start with one personalization method and build from there as your system evolves.
How do handmade stickers improve planner organization?
Handmade stickers serve as visual cues that help your brain quickly identify different categories and priorities. Unlike generic stickers, artistically designed stickers can create an emotional connection to your planning system. They work best for marking habit trackers, priority levels, and time-blocking sections. The tactile experience of applying thoughtfully designed stickers, ones that feel expressive and human-made, transforms planning from a chore into something you genuinely want to engage with daily.
Can I use vinyl stickers on different planner paper types?
Yes, quality vinyl stickers work on most planner papers, though thicker, smoother pages hold them best. Glossy or coated planner pages provide the strongest adhesion. If your planner has thinner, more porous paper, test a sticker on the back cover first. Handmade vinyl stickers are designed to last through regular handling and won't peel off easily. Apply stickers when your planner pages are completely dry for the best grip.
What's the difference between minimalist and maximalist planner personalization?
Minimalist personalization uses selective color, limited sticker placement, and clean spacing, perfect if visual clutter overwhelms you. Maximalist approaches layer multiple design elements, bold colors, and abundant stickers across pages, ideal if visual richness motivates you. Neither is wrong; it depends on how your brain processes information. Neurodivergent planners often benefit from one extreme or the other rather than middle-ground approaches. Experiment with both to discover what actually helps you stay organized rather than what looks pretty on social media.