
Best Ways to Display Vinyl Stickers on Laptops
Mitchell AdelmanTable of Contents
- Prepare Your Laptop Surface for Sticker Application
- Best Laptop Sticker Layout Ideas for Visual Balance
- Vinyl Sticker Types and Their Placement Differences
- Application Technique: Getting Vinyl Stickers to Stick Right
- How to Remove Vinyl Stickers from Laptop Without Residue
- Using a Clear Laptop Case for Stickers
- Protect Your Stickers: Care and Maintenance
- Common Mistakes to Avoid
- Frequently Asked Questions
Last Updated: August 31, 2026
Your laptop is a blank canvas. The best ways to display vinyl stickers aren't just about slapping them on randomly, they're about creating a curated visual story that reflects who you are. At Cerulean Rooster, we create hand-illustrated vinyl stickers designed to be expressive and personal. We've learned that how you arrange them makes all the difference.
This guide covers surface prep, layout strategies, application techniques, removal methods, and long-term care. We'll walk you through the most effective methods so your sticker display stays vibrant, adheres properly, and looks intentional.
Prepare Your Laptop Surface for Sticker Application
Before you place a single sticker, your laptop surface needs attention. A clean and dry foundation determines whether your vinyl decals stick properly and stay put.
Start by wiping your laptop lid with a soft, lint-free cloth to remove dust and debris. For visible grime or fingerprints, use a slightly damp cloth with warm water, then dry thoroughly. For stubborn residue from old stickers, isopropyl alcohol works well, dampen a cloth, gently rub the affected area, then let it air dry completely. Never rush this step; moisture trapped under a sticker causes adhesion problems.
Smooth laptop lids accept vinyl stickers better than textured finishes. Glossy surfaces provide the best adhesion because they offer no texture for air to hide in. Matte or textured coatings still work but may show slight air pockets at the edges, this is normal and doesn't affect durability.
Temperature matters too. Apply stickers in a room-temperature environment, ideally between 60-75 degrees Fahrenheit (3m.com). Cold surfaces reduce adhesive effectiveness, and heat can cause vinyl to expand, making precise placement difficult. Give your laptop at least 30 minutes to acclimate if you've just brought it in from a cold environment.
Best Laptop Sticker Layout Ideas for Visual Balance
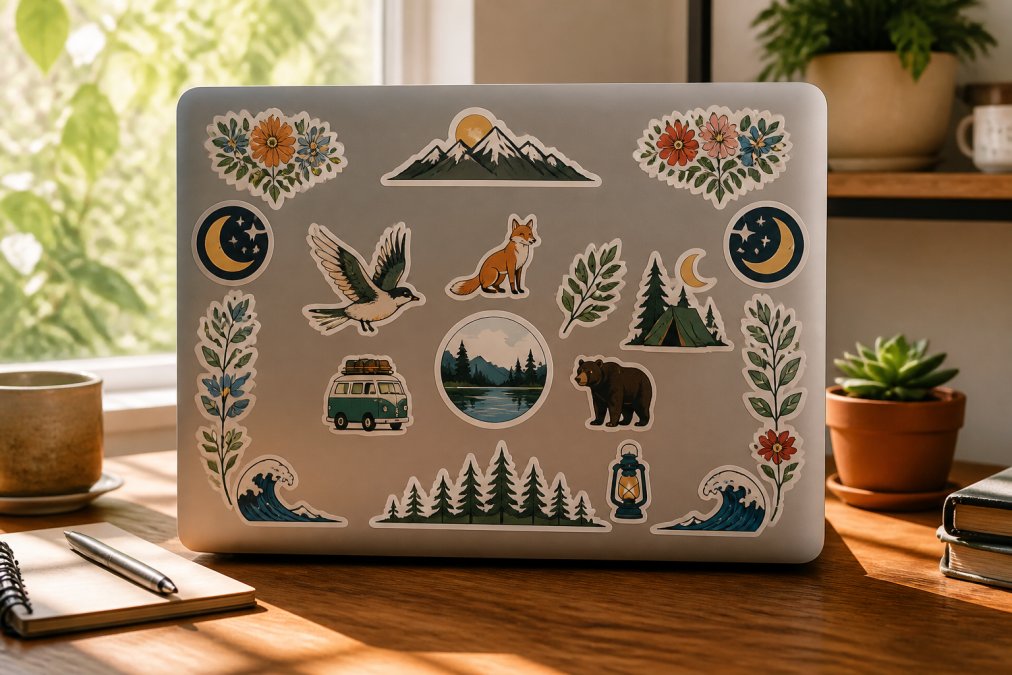
How you arrange your stickers transforms your laptop from a tool into a personal statement. Two main approaches dominate: symmetrical arrangement and eclectic ensemble. Each creates a different visual impact.
Symmetrical Arrangement
Symmetrical layouts create order and visual calm. This approach places stickers in a balanced, mirrored pattern, typically along the edges or in a centered grid. It appeals to people who want their laptop to feel polished and intentional.
Start by identifying your anchor sticker, the largest or most visually dominant piece. Place it in the center or at a key corner, then add stickers of similar size on opposite sides. This creates visual equilibrium. Many people frame their laptop lid with a border of stickers, leaving the center open or featuring one focal point.
The benefit is clarity and curation. This layout works particularly well if you have stickers from a matching series, like the Four Seasons Sticker Bundle from Cerulean Rooster, which includes Spring King, Summer Joker, Fall Jack, and Winter Queen, four seasonal characters that tell a cohesive story when displayed together. Symmetrical layouts also protect your sticker investment by spacing them intentionally with breathing room, reducing overlap damage and making individual removal easier.

Eclectic Ensemble Approach
Eclectic layouts embrace visual abundance and personality. This approach layers stickers of varying sizes, styles, and colors across the entire lid, creating a living collage. It's perfect for people who want their laptop to feel expressive and unique.
The key to successful eclectic arrangement is visual balance despite the chaos. Distribute your largest stickers and brightest colors across the surface so your eye has multiple focal points. Start with your largest or most striking sticker placed off-center, then add medium-sized stickers around it with small gaps. Fill remaining space with smaller accent stickers, rotating some at slight angles for dynamism.
Eclectic layouts work beautifully with diverse sticker collections. If you're pulling from different themes, like mixing the Dead Spaceman designs with the Irish Bagpiper and the Menacing Astronaut from Cerulean Rooster, an eclectic approach lets each piece shine while contributing to a unified, expressive whole.
Vinyl Sticker Types and Their Placement Differences
Not all vinyl stickers are created equal. Understanding the differences helps you choose the right placement for each design.
Die-Cut Stickers
Die-cut stickers are cut to the exact shape of the design, with no excess vinyl around the edges. This creates clean, defined outlines and a professional appearance. They're ideal for laptops because they sit flush against the surface and don't create visible borders.
Die-cut stickers work best on smooth surfaces and adhere reliably to laptop lids. They're also easier to remove cleanly because there's no excess material pulling at the edges. If you're building a symmetrical or semi-organized layout, die-cut stickers are your best choice. The Cerulean Rooster Die-Cut Vinyl Sticker features the brand's bold rooster mascot with crisp lines and vibrant blue tones that pop against any laptop color.
Because die-cut stickers have defined edges, their position matters visually. Take your time positioning them, especially if they're larger or more visually dominant.
Clear and Matte Finish Options
Clear-backed stickers have a transparent vinyl background that extends beyond the design. Matte finish stickers have a non-glossy surface that diffuses light and reduces glare. Both have distinct advantages.
Clear stickers are forgiving. The transparent backing makes them blend into eclectic layouts because you can overlap them without creating visible rectangular frames. They're also easier to reposition during application because the transparency lets you see exactly where the design will land.
Matte finish stickers reduce shine and create a more subdued, sophisticated look. They photograph better in bright light and are slightly more water-resistant than glossy stickers, making them ideal if your laptop travels frequently. The trade-off is that matte stickers are slightly more visible when layered because the finish difference creates subtle shadows.
Application Technique: Getting Vinyl Stickers to Stick Right
How you apply a vinyl sticker determines whether it stays put for years or starts peeling within weeks.
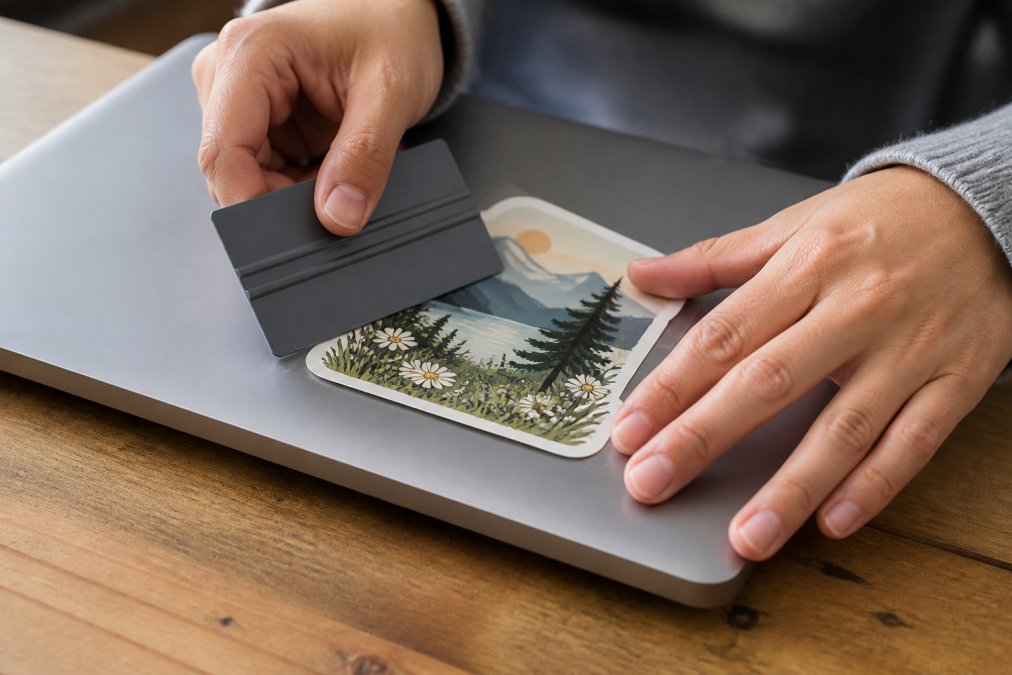
Position your sticker exactly where you want it without sticking it down yet. Step back and look at it from different angles. Check the spacing relative to other stickers or the laptop edges. Once you're certain about placement, press down one edge gently to act as a hinge, then slowly lower the rest of the sticker onto the surface.
Now comes the crucial step: adhesion pressure. Use a squeegee, credit card edge, or your fingernail to apply firm, even pressure across the entire sticker (the FDA). Work from the center outward, pushing out any air bubbles as you go. Spend at least 30 seconds on this step. The pressure activates the adhesive fully and ensures the sticker bonds to the surface.
Small air bubbles often disappear within 24 hours as the adhesive fully sets. Larger bubbles can be addressed by gently lifting the sticker edge and re-pressing, or by using a fine needle to puncture the bubble and press the air out.
After application, leave the sticker undisturbed for at least 24 hours. Don't close your laptop, don't wipe the area, don't apply pressure. The adhesive needs time to cure fully. In cold or very dry environments, add another 12 hours to the cure window.
How to Remove Vinyl Stickers from Laptop Without Residue
Eventually, you'll want to change your sticker display or remove a damaged piece. Residue-free removal is possible with the right technique and patience.
Step-by-Step Residue-Free Removal
Start by lifting one corner of the sticker gently with your fingernail or a plastic scraper. Don't yank, slow and steady wins here. Peel the sticker back at a shallow angle, roughly 45 degrees or less. The shallower the angle, the less likely you'll tear the sticker or leave residue.
As you peel, if you feel significant resistance, stop and apply heat. Use a hair dryer on low or medium setting, holding it 6 inches from the sticker for 20-30 seconds. Heat softens the adhesive, making removal easier. Then resume peeling slowly.
Work your way around the sticker's edges, lifting gradually rather than pulling one corner all the way off. This distributes the stress and prevents tearing.
Adhesive Residue Cleanup
If residue remains after sticker removal, isopropyl alcohol is your solution. Dampen a cloth with isopropyl alcohol and gently rub the sticky area in circular motions. The adhesive will ball up and roll off the surface. For stubborn residue, let the isopropyl alcohol sit on the area for 30 seconds before rubbing.
Never use harsh solvents or abrasive scrubbers on your laptop. Isopropyl alcohol is mild enough to be safe on most laptop surfaces while still being effective on vinyl adhesive.
After cleanup, wipe the area with a dry cloth and let it air dry completely before applying new stickers.
Using a Clear Laptop Case for Stickers
A clear protective case offers a creative alternative to placing stickers directly on your laptop lid. This approach lets you display vinyl stickers without any permanent commitment, and it protects your laptop from scratches and minor damage.
With a clear case, you can apply stickers to the outside of the case itself, creating a removable sticker display. The case acts as a protective barrier between your stickers and the elements. If a sticker fades or you want to change your display, you simply remove it from the case rather than your laptop.
This method also solves the heat dissipation question, stickers on a case don't interfere with your laptop's venting system. The downside is that a clear case may add a subtle gloss or distortion to how your stickers look. Some people prefer the direct-to-lid aesthetic for this reason.
Protect Your Stickers: Care and Maintenance
Once your stickers are in place, keeping them vibrant and durable requires minimal but intentional care. Vinyl stickers are water-resistant and durable, but environmental factors can affect them over time.
Avoid prolonged direct sunlight exposure. UV rays fade vinyl colors gradually (peer-reviewed research). If your laptop sits on a sunny desk regularly, your stickers will lose vibrancy faster than if they're kept in shade.
Heat is another consideration. Don't place your laptop on soft surfaces like beds or couches for extended periods, as these trap heat and can cause the laptop to run hotter than normal. Sustained heat can degrade vinyl adhesive and cause stickers to peel at the edges. Use a laptop stand or hard surface to ensure proper ventilation.
Moisture is generally not a problem with quality vinyl stickers. They're water-resistant and can handle occasional splashes. However, avoid submerging your laptop or leaving it in humid environments for weeks.
Clean your stickers gently. If dust accumulates, use a soft, dry cloth to wipe them. Avoid harsh cleaners or abrasive materials. Check your stickers periodically for peeling edges, especially at corners or where stickers overlap. If you notice lifting, apply gentle pressure to re-adhere it.
Common Mistakes to Avoid
Understanding what not to do is just as important as knowing what to do.
Skipping surface preparation is the most common error. Applying stickers to a dusty or damp laptop guarantees poor adhesion and eventual peeling. Spend the five minutes to clean your surface properly.
Applying stickers in cold environments reduces adhesive effectiveness. If your room is below 60 degrees Fahrenheit, wait for it to warm up before applying stickers.
Insufficient pressure during application leaves air bubbles and weak adhesion. Spend at least 30 seconds pressing firmly across the entire sticker.
Removing stickers too quickly after application can disrupt the adhesive bond. Patience here prevents future peeling.
Overcrowding your laptop lid can create visual chaos that feels cluttered rather than curated. Even with an eclectic approach, leave some breathing room.
Mixing incompatible sticker types without planning can create visual discord. If you're combining die-cut and clear stickers, think about how their different finishes and edges will interact.
Ignoring heat and UV exposure over time degrades your display. If your laptop sits in direct sunlight regularly or runs hot, your stickers will fade and peel faster.
Your laptop sticker display is an extension of your personality. Whether you choose symmetrical balance or eclectic abundance, the techniques matter, proper surface prep, careful application, thoughtful placement, and gentle maintenance keep your display looking intentional and vibrant for years.
At Cerulean Rooster, we create vinyl stickers designed to be expressive and personal. Our hand-illustrated designs, from the bold Cerulean Rooster Die-Cut Sticker to the cosmic chaos of the Dead Spaceman designs, are made to tell your story. Expressive art is our medium of communication, as we're deaf brothers, and every sticker carries that intentionality.

Start with our Pick Any 4 Stickers of Your Choice bundle or explore the Four Seasons Sticker Bundle to build a curated collection that feels uniquely yours. Every sticker is hand-packed in our studio by our family, bringing genuine artistry to your everyday gear. Shop All and create a display that reflects who you are.

Frequently Asked Questions
Can vinyl stickers damage a laptop surface?
Quality vinyl stickers won't damage your laptop when applied correctly to a clean, dry surface. The key is using stickers designed for laptops and avoiding prolonged exposure to extreme heat. Our hand-illustrated vinyl stickers are printed on durable material that adheres securely without harming most laptop finishes. Remove them carefully using the residue-free techniques in this guide to keep your laptop looking pristine.
What's the best way to remove vinyl stickers without residue?
Start by gently lifting one corner of the sticker with your fingernail or a plastic scraper. Peel slowly at a 45-degree angle to avoid tearing. If adhesive residue remains, apply isopropyl alcohol on a soft cloth and rub gently in circular motions. For stubborn residue, let the alcohol sit for 30 seconds before wiping. Always test on an inconspicuous area first to ensure your laptop finish won't be affected.
Should I use a clear laptop case to display stickers?
A clear case is an excellent option if you want to protect your stickers while keeping them visible. It shields them from scratches, water, and UV damage that could fade colors over time. Clear cases also make it easy to rearrange or swap stickers without worrying about adhesive wear. However, if you prefer direct application, quality vinyl stickers on a clean laptop surface will last for years with proper care and maintenance.
How do I arrange stickers on my laptop for a clean look?
Start with surface preparation, clean and dry your laptop completely. Choose a layout style: symmetrical arrangements feel organized and professional, while eclectic ensembles create personality and visual interest. Place larger stickers first as anchors, then fill gaps with smaller designs. Leave breathing room between stickers to avoid visual clutter. Consider color balance and the natural focal points of your laptop lid. Our curated sticker bundles like the Four Seasons collection are designed to work beautifully together on any surface.
This article was written using GrandRanker